A Complete Guide: Car Interior Detailing and Cleaning
Eliminate sticky residue, pet hair, and crumbs from your car’s interior. A clean interior not only makes for a pleasant driving experience but regular cleaning also extends your car's lifespan. Whether you transport pets, kids, or guests, maintaining a clean interior prevents material degradation, ensuring a comfortable and long-lasting ride. Say farewell to spills and crumbs with this full guide to interior cleaning products and methods.
Table of Contents
- Why It Matters
- What You Need
- The Process
- Key Takeaways
Why a Clean Car Interior Matters
Understanding the nuances of car interior cleaning is crucial for maintenance and safeguarding your investment. The accumulation of dirt and grime over time can deteriorate interior materials, resulting in a dingy appearance and potential odor issues. Neglecting this upkeep may lead to more significant problems.
What You’ll Need for an Interior Detail
Achieving a showroom-condition car interior requires the right chemicals and equipment. It matters what you use. Some cleaners are better suited for your vehicle than others.
What is the best thing to use to detail the inside of a car?
The best products you can use to clean your car (inside or out) are those that are specifically designed for it. Your best bet is to avoid any household cleaners or shortcuts. Cleaning solutions for the home may contain harsh chemicals that could harm your car's surfaces over time. Vehicle surfaces are relatively sensitive and can be damaged easily. To ensure the longevity of materials like leather, plastic, and upholstery, opt for specialized products that are made for these surfaces and designed around these sensitivities.
Cleaners You Will Need
- Degreaser or all-purpose cleaner
- Hard surface cleaner
- Interior dressing
- Leather cleaner
- Leather conditioner
- Leather protectant
- Spot stain remover
- Carpet and upholstery cleaner
- Odor-eliminating spray
- Glass cleaner
Equipment You Will Need
- Garage or shaded area
- Mat hangers/clips
- Vacuum with attachments
- Access to water
- Disposable gloves
- Stiff-bristle scrub brush
- Soft-bristle brush
- Clean microfiber towels
- Applicator pads
- Duster
- Empty spray bottles
The Process: How to Clean the Interior of Your Car Like the Pros
Before You Begin
Prior to any interior car detailing, make sure all interior automotive surfaces are cool and you have access to a garage or can work out of direct sunlight. Never clean or detail hot surfaces of a vehicle, as temperature can affect the consistency of cleaning chemicals and can even cause damage to those surfaces.
Gather all of your cleaning supplies and make sure you are familiar with all product label instructions. Follow all application and safety instructions exactly. Always test chemicals for colorfastness and transfer before full application, as directed by the product label instructions.
1. Vacuum Large Debris
Use a vacuum (small or handheld is ideal) to remove all large and loose dirt and debris from your interior. Get into all nooks, crannies, and crevices to prevent pushing these particles deeper into the interior surfaces while cleaning.
2. Clean and Hang Floor Mats
Start your DIY interior detail by removing all floor mats. Thoroughly saturate all mats with a degreaser, like Prizm™️ Gold Citrus Degreaser. If necessary, agitate the mat surfaces with a stiff-bristle scrub brush. Rinse away all dirt and remaining degreaser. Air dry your floor mats while you complete the rest of your interior detail. Mat hangers and clamps are available for optimal drying.
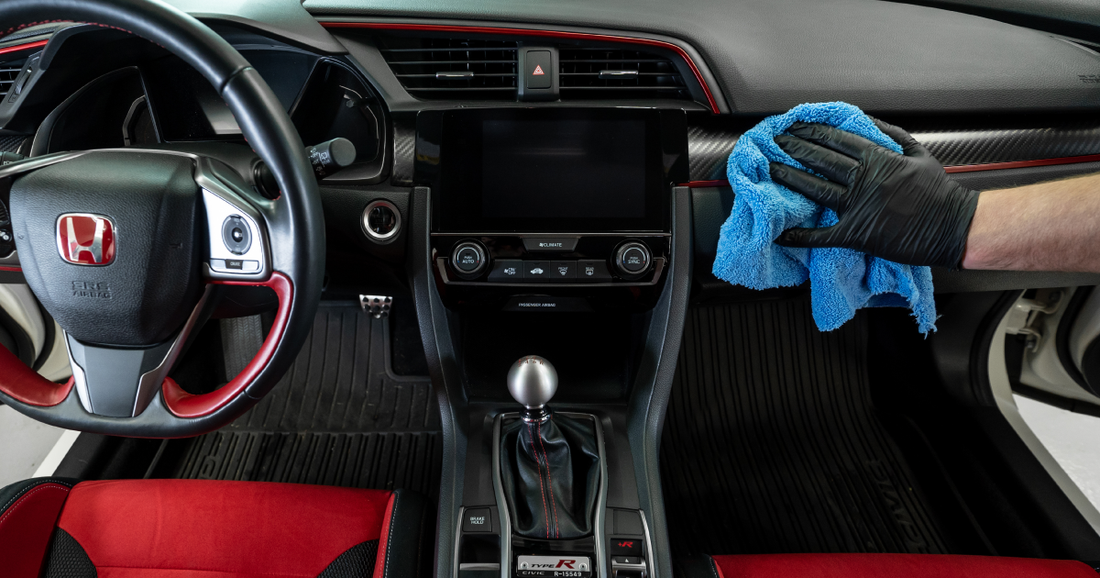
3. Clean Hard Plastic Surfaces
The next interior auto detailing step is cleaning all hard plastic surfaces. This can include parts of your vehicle, like air vents, the center console, the dashboard, inside door panels, seat backs, cupholders, steering wheel, and more. Start by dusting the dashboard. Then, choose a material-compatible cleaner and use it to clean all plastic surfaces, as directed.
Depending on the cleaner, you may be able to spray the solution directly onto the plastic. Others, you may need to apply with a cloth or sponge. Work the cleaner into the surface, covering the entire area. When complete, wipe down the surface with a clean microfiber towel.
4. Protect Hard Plastic Surfaces
Now that you’ve cleaned your plastic surfaces, it’s important to protect them. Enhance and safeguard these surfaces with an automotive dressing. Follow label instructions for proper dilution and application practices. Never apply dressing to the steering wheel or pedals. Dressing creates a slick surface, and this can be dangerous if used on certain parts of the vehicle.
To clean and dress hard plastic surfaces in just one step, consider a two-in-one cleaner, like Clean & Shine™️ for Leather, Plastic and Vinyl. This unique formula powers away grease, grime, and dirt while protecting and restoring a rich satin gloss to leather, plastic, and vinyl surfaces. For an even quicker clean and regular upkeep, use the Clean & Shine™️ Wipes. Made with the same great formula, these wipes clean and dress surfaces all at once for the most convenient approach to interior cleaning.
5. Clean Leather Surfaces
Next up, all leather surfaces in your car need a good cleaning. There are generally three types of leather used in car interiors: vinyl, coated, and aniline. Identifying the type of leather used in your vehicle interior is crucial for selecting the appropriate cleaning solution. Using an incompatible cleaner can lead to discoloration and other damage.
For cleaning automotive leather surfaces, we like Leather & Plastic Interior Cleaner. It is a penetrating formula that restores leather, plastic, and vinyl to a like-new appearance. It cleans down to the pore level to leave surfaces clean and film-free.
6. Condition and Protect Leather Surfaces
While vinyl surfaces do not require conditioning, leather (rich in natural oils) tends to lose moisture over time, leading to dryness and cracking. This is why regular conditioning is an essential step in leather care. It's advisable to condition automotive leather surfaces each time they are cleaned to restore and preserve their texture.
Our Leather Conditioner excels in revitalizing tired or hardened leather, eliminating soil without leaving greasy residue. This solution is enriched with natural moisturizers and is safe for use on any leather color.
All leather types benefit from added protection. Ensuring the durability of your automotive leather surfaces is crucial to the material’s appearance and lifespan. Sun damage, stains, and dye transfer can largely be avoided with the application of a leather protectant. These formulas form a protective barrier against such threats.
For simultaneous cleaning and protection of leather and vinyl surfaces, consider using EPIC®️ Leather Coat Interior Protective Creme. It is specifically designed to prevent the staining, color transfer, and UV damage of leather and vinyl. Effective against various stains like ink, ketchup, wine, and more, it provides comprehensive protection to these surfaces.
For the most simplified approach to leather care, try our Leather Wipes. These durable, non-linting wipes are infused with a formula that cleans, moisturizes, and protects leather surfaces. Rejuvenate and enrich your leather interior surfaces while protecting them from drying, fading, and premature wear.
As mentioned, the most important factor in leather care is the type of leather. For more on restoring, cleaning, and preserving interior leather surfaces, read our blog on cleaning and protecting leather car seats.
7. Spot Clean Stubborn Stains
Removing stains from carpet and upholstery can take up valuable time. For efficiency, we recommend starting with any spot-removal efforts. Choose a spot cleaner that is compatible with the fabrics in your vehicle and follow all application and safety instructions.
Some stains may require agitation with a soft-bristle brush. If so, use it in a gentle circular motion to release the stain. Repeat as needed until the stain is gone. Once you've eliminated the stain, swab the area with a clean, damp cloth and allow it to dry.
For a fast-acting formula that lifts stubborn stains quickly and easily, try Instant Out Spot & Stain Remover. It is designed for oil and water-based stains and is effective on ink, grease, oil, cola, coffee, pet stains, shoe polish, lipstick, and more without any scrubbing or agitation.
Safe and effective stain removal largely depends on the material and type of stain. Read more on removing stains from car carpet and upholstery.
8. Clean Carpet and Upholstery
When all tricky spots and stains have been addressed, your carpeted and upholstered automotive surfaces are ready for general-purpose cleaning. Choose a cleaning solution that is designed to be effective on all fabric and upholstered automotive surfaces. We like Xtrax™️ Carpet & Upholstery Cleaner for general soils.
Whatever cleaner you choose, always read all label instructions and test for colorfastness in an inconspicuous area before using. Then, apply your cleaner as directed and agitate with a soft-bristle brush, if necessary. If directed to do so, remember to blot up any remaining cleaner before allowing surfaces to air dry.
9. Deodorize Your Cabin
Your interior surfaces have all been cleaned and protected. Now, how do you remove odors from the car interior? Not all automotive fabric cleaning solutions are formulated with odor-eliminating agents. To dispel lingering odors, use an air freshener or deodorizer that is designed to eliminate unpleasant smells from your vehicle, like Odor Sniper™️ Fragrance Free Odor Eliminator.
10. Clean Your Windows
Finally, clean the windows and mirrors of your vehicle. Roll all windows up completely, and open the doors to reach all parts of the glass. Coat one side of the window with a light, even layer of glass cleaner. Wipe away the cleaner, in an up-and-down motion, with a clean microfiber cloth. Then, coat the other side of the window and wipe away the cleaner in a side-to-side motion.
Wiping the glass in a different direction on each side allows you to identify any streaks and determine which side they are on. For streak-free cleaning of windows, mirrors, and windshields, we recommend our Ammonia-Free Glass Cleaner. It works on all glass surfaces, including aftermarket tinted windows.
Key Takeaways: Interior Detailing is About More than Aesthetics
Detailing your car's interior is not only about enhancing aesthetics but also about preserving the longevity of your vehicle. Regular cleaning prevents the accumulation of dirt, grime, and unpleasant odors, for a fresh and comfortable environment. From cleaning floor mats to protecting leather surfaces and eliminating stubborn stains, each step contributes to achieving that dealership-fresh cleanliness. Make this routine part of your car care regimen to enjoy a consistently clean and inviting driving experience.